- Android中数据库常见操作实例分析
- Android中使用BitmapShader类来制作各种图片的圆角
- android ListView和ProgressBar(进度条控件)的使用方法
- Android(2.2/2.3系统)Gallery解决默认和横竖屏切换选中状态问题
- Android提高之AudioRecord实现助听器的方法
- Android中实现自动生成布局View的初始化代码方法
- Android编程实现的重力感应示例代码
- Android图片加载的缓存类
- Android中findViewById获取控件返回为空问题怎么解决
- Android中Spinner控件之键值对用法实例分析
- Android4.1中BinderService用法实例分析
- Android 开发随手笔记之使用摄像头拍照
- Android程序美化之自定义ListView背景的方法
- Android通过Movie展示Gif格式图片
- 让Android中RadioGroup不显示在输入法上面的办法
- Android获取周围WIFI热点服务
- pp列表之分组ListView详解
- Android中dip、dp、sp、pt和px的区别详解
- android实现圆角矩形背景的方法
- Android编程向服务器发送请求时出现中文乱码问题的解决方法
- 简单介绍Android中Activity的四种启动模式
- Android相册效果(使用C#和Java分别实现)
- Android中实现Runnable接口简单例子
- 30分钟搞清楚Android Touch事件分发机制
- 分享几个Android开发有用的程序代码
- Android中颜色选择器和改变字体颜色的实例教程
- Android中关于FragmentA嵌套FragmentB的问题
- Android实现动画效果详解
- 实例解析Android系统中的ContentProvider组件用法
- android创建数据库(SQLite)保存图片示例
Android实现上拉加载更多以及下拉刷新功能(ListView)
作者:佚名 Android开发编辑:admin 更新时间:2022-07-23
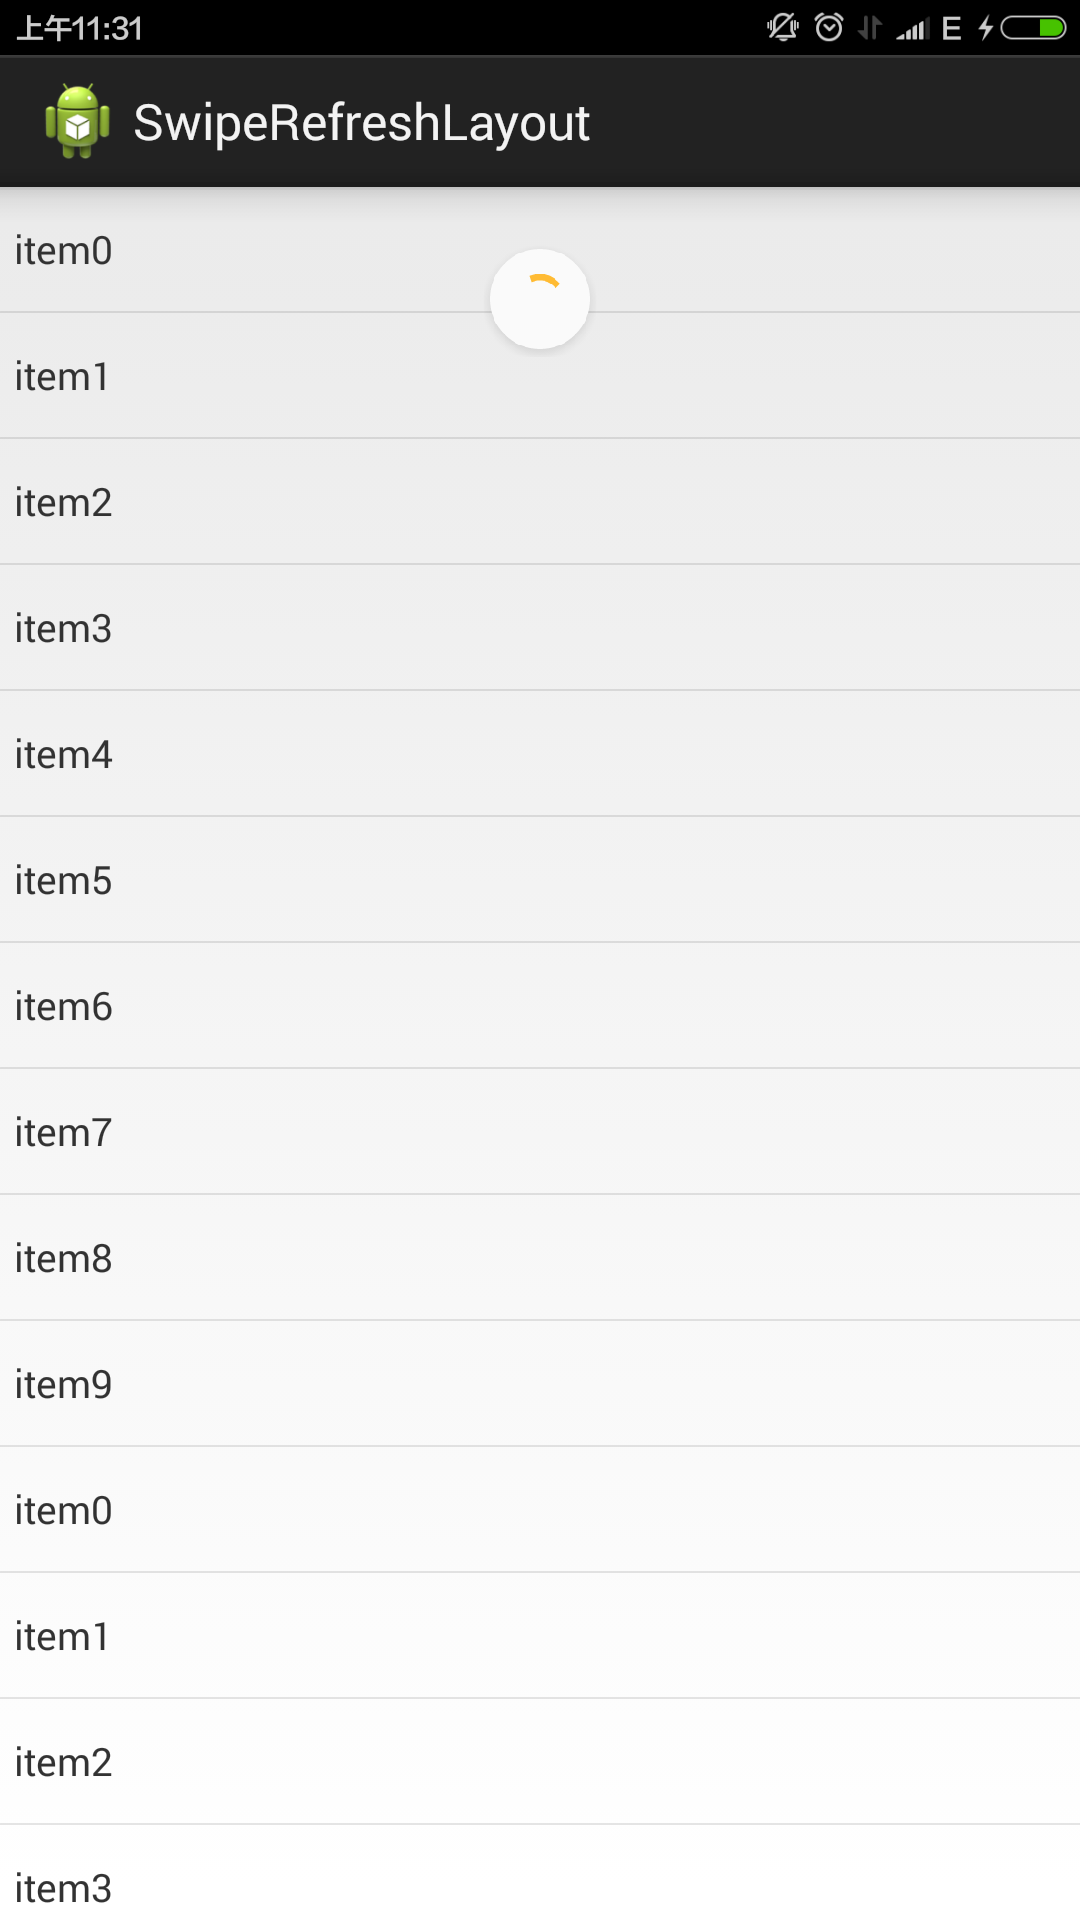
首先为大家介绍Andorid5.0原生下拉刷新简单实现。
先上效果图;
相对于上一个19.1.0版本中的横条效果好看了很多。使用起来也很简单。

 <FrameLayout xmlns:android="http://schemas.android.com/apk/res/android"
 xmlns:tools="http://schemas.android.com/tools"
 android:id="@+id/container"
 android:layout_width="match_parent"
 android:layout_height="match_parent"
 tools:ignore="MergeRootFrame" >

 <android.support.v4.widget.SwipeRefreshLayout
  android:id="@+id/swipe_container"
  android:layout_width="match_parent"
  android:layout_height="match_parent" >

  <ListView
   android:id="@+id/list"
   android:layout_width="match_parent"
   android:layout_height="match_parent" >
  </ListView>
 </android.support.v4.widget.SwipeRefreshLayout>

</FrameLayout>
package hi.xiaoyu.swiperefreshlayout;

import hi.xiaoyu.swiperefreshlayout.adapter.TestAdapter;

import java.util.ArrayList;
import java.util.List;

import android.app.Activity;
import android.os.Bundle;
import android.os.Handler;
import android.support.v4.widget.SwipeRefreshLayout;
import android.support.v4.widget.SwipeRefreshLayout.OnRefreshListener;
import android.widget.ListView;

public class MainActivity extends Activity implements OnRefreshListener {

 private SwipeRefreshLayout swipeLayout;
 private ListView listView;
 private List<String> listDatas;
 private TestAdapter adapter;

 @Override
 protected void onCreate(Bundle savedInstanceState) {
  super.onCreate(savedInstanceState);
  setContentView(R.layout.activity_main);
  swipeLayout = (SwipeRefreshLayout) findViewById(R.id.swipe_container);
  listView = (ListView) findViewById(R.id.list);
  swipeLayout.setOnRefreshListener(this);
  swipeLayout.setColorSchemeResources(android.R.color.holo_orange_dark,
    android.R.color.holo_green_light,
    android.R.color.holo_orange_light,
    android.R.color.holo_red_light);
  listDatas = new ArrayList<String>();
  for (int i = 0; i < 10; i++) {
   listDatas.add("item" + i);
  }
  adapter = new TestAdapter(this, listDatas, R.layout.test_item);
  listView.setAdapter(adapter);
 }

 public void onRefresh() {
  new Handler().postDelayed(new Runnable() {
   public void run() {
    swipeLayout.setRefreshing(false);
    listDatas.addAll(listDatas);
    adapter.notifyDataSetChanged();
   }
  }, 3000);
 }

}
几行代码就可以实现下拉刷新,效果也还不错,不用引入第三方jar,唯一的缺憾就是没有上拉加载,不知道谷歌工程师基于什么方面的考虑,希望能在下个版本看到。不过自己修改下源码加一个上拉也比较简单,结合上个一个版本的刷新效果做成上拉效果还不错。
二、Android实现上拉加载更多功能以及下拉刷新功能
采用了目前比较火的PullToRefresh,他是目前实现比较好的下拉刷新的类库。
目前他支持的控件有:ListView, ExpandableListView,GridView,WebView等。
首先第一步当然是导入libriay到咱们的项目了,具体导入方式,这里不再赘述。
下面是个例子采用的是ListView,当然其余的和这个类似
1、布局文件activity_main.xml
<RelativeLayout xmlns:android="http://schemas.android.com/apk/res/android"
 xmlns:tools="http://schemas.android.com/tools"
 android:layout_width="match_parent"
 android:layout_height="match_parent"
 tools:context=".MainActivity" >

  <com.handmark.pulltorefresh.library.PullToRefreshListView
  android:id="@+id/pull_refresh_list"
  android:layout_width="fill_parent"
  android:layout_height="fill_parent" />
</RelativeLayout>
2、要实现下拉刷新的功能很简单,只需要实现OnRefreshListener的OnRefresh方法即可。
这里说一下如何实现上拉和下拉分别执行不同的操作。
原理是:根据下拉和上拉显示的布局的可见状态类区分上拉还是下拉,然后执行相应操作。
在PullToRefresh的类库的com.handmark.pulltorefresh.library包下,打开PullToRefreshBase.java,在这个类的最后面添加如下代码:
public boolean isHeaderShown() {

 return getHeaderLayout().isShown();

}

public boolean isFooterShown() {

 return getFooterLayout().isShown();
}
3、在Activity的代码如下:
public class MainActivity extends ListActivity {

 private PullToRefreshListView mPullToRefreshListView;

 private LinkedList<String> mItemList;
 private ArrayAdapter<String> adapter;
 private Context context;
 @Override
 protected void onCreate(Bundle savedInstanceState) {
  super.onCreate(savedInstanceState);
  setContentView(R.layout.activity_main);
  context = this;
  initData();
  adapter = new ArrayAdapter<String>(this, android.R.layout.simple_list_item_1, mItemList);
  //初始化控件
  mPullToRefreshListView = (PullToRefreshListView)findViewById(R.id.pull_refresh_list);
  ListView mListView = mPullToRefreshListView.getRefreshableView();
  mListView.setAdapter(adapter);
  //设置pull-to-refresh模式为Mode.Both
  mPullToRefreshListView.setMode(Mode.BOTH);
  //设置上拉下拉事件
  mPullToRefreshListView.setOnRefreshListener(new OnRefreshListener<ListView>() {

   @Override
   public void onRefresh(PullToRefreshBase<ListView> refreshView) {
    if (refreshView.isHeaderShown()){
     Toast.makeText(context, "下拉刷新",Toast.LENGTH_SHORT).show();
     //下拉刷新 业务代码
    }else {
     Toast.makeText(context, "上拉加载更多",Toast.LENGTH_SHORT).show();
     //上拉加载更多 业务代码

    }

   }
  });

 }


 private void initData(){
  //初始化数据
  mItemList = new LinkedList<String>();
  mItemList.addAll(Arrays.asList(data));

 }

 private String[] data = new String[]{"data1","data2","data3","data4","data5","data6",
   "data1","data2","data3","data4","data5","data6"};
}
如上代码所示,在OnRefresh的实现代码中,用以区分上拉还是下拉,关键代码如下:
if (refreshView.isHeaderShown()){
     Toast.makeText(context, "下拉刷新",Toast.LENGTH_SHORT).show();
     //下拉刷新 业务代码
    }else {
     Toast.makeText(context, "上拉加载更多",Toast.LENGTH_SHORT).show();
     //上拉加载更多 业务代码
    }
至此,运行项目,可以得到演示结果了。
文章内容很丰富,希望对大家学习Android实现上拉加载更多以及下拉刷新功能有所帮助。
- 上一篇文章: Android学习之Fragment
- 下一篇文章: Android 马赛克(Mosaics)效果