
�������ڵ�λ�ã� �������� >> �������� >> ��վ���� >> app�������� >> Android���� >> myeclipse android�����ͼ�Ľ̳�
- Androidʵ��EditText���ݱ���ΪBitmap�ķ���
- ��Android�д����˵���Menu�Լ���ȡ�ֻ��ֱ��ʵĽ������
- ���Android�ļ��洢
- android ImageView �ļ��㾭���ܽ�
- android����gif��ʽͼƬʾ��
- Android webview��js����JSON��������ʾ��
- Android��HttpURLConnection��HttpClient��ʹ�����װ
- Android�Զ���ؼ�ʵ�ֿ����һ����ĵ�����
- [Android�������㿪ʼ].24.���ݴ洢(3)
- Android�ͻ�����������_7��Android����������˼��
- ����Android����AlertDialog�Ի���Ч��
- Android�Զ���HorizontalScrollView���쳬ǿGalleryЧ��
- Androidʵ�ֱ�����ʾ���ع���
- Android�������ü�Roboto����ʹ�÷���
- ����Androidʵ��ListViewԲ��Ч��
- Android ʹ��Vitamio�����Լ������ܲ�������2������ ���ƿ������ȡ�����������
- ������Android��ΪTextView�����Զ���HTML��ǩ��ʵ�ַ���
- Android���Զ��������ʽͼƬ�ľ���ʵ��
- Android��ʹ��WebSocketʵ��Ⱥ�ĺ���Ϣ������(��ʹ��WebView)
- Android��̻�ȡ������Activity���ȵķ���
- Android UI���ϵ��֮�Զ���TextView����ʵ�ִ��»��ߵ��ı���4��
- Android��3��ͼƬѹ����������
- Android���ʵ��ListViewͷ��ViewPager�����ѯͼЧ��
- Javaʵ��Andriod���������ļ���������
- java,Android:��eclipse�еĿ�ݼ�(�����ղ�)
- Androidʵ�ֵķ��Ա����ﳵdemoʾ��
- Android��̻���Ч��֮Gallery+GridViewʵ��ͼƬԤ������(��demoԴ������)
- android���֮ip2id����ʵ��
- һ����ʵ��Viewpager��Ƭ��ҳЧ��
- Android ��������ʵ������
myeclipse android�����ͼ�Ľ̳�
���ߣ����� Android�����༭��admin ����ʱ�䣺2022-07-23
1��������������
��װJDK1.5����,Eclipse3.3���ϰ汾.��MyEclipseҲ���ԣ������߰�װ��JDK1.6��MyEclipse 8.6��
2������Android SDK
�� �����ҵ��ǣ�Android.com ������ǿ���GFW ��ǽ�ˣ����������ֲ��ò�ȥ�������أ���Ȼ�����ܴ����������õ�SDKҲ�ܲ���Ŷ���������Dz��ò�***����Ȼ***�ķ����ܶ࣬������Ҳ����˵�ˣ���� ��ʵ��û���ҵ����������Լ�QQ 276294057 ���ҽ�����
��ַ��http://developer.android.com/sdk/index.html
���سɹ���
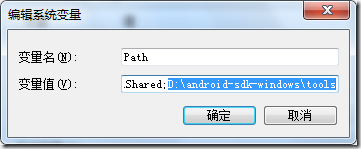
3������SDK����������
��Ҫ����path �м���SDK �µ�toolsĿ¼��
4����MyEclipse��װADT���
��eclipse��help�˵�->MyEclipse Configuration Center
���window �C>preferences
6��AVD����
���window-> Android SDK and AVD Manager
��Ϊ��Ҫ�����Բ��ԣ����������������� ��װЩ�汾��
Ȼ���Install Selected ��ʼ��װ��������һ�������Ĺ��̣����ܷdz��������Ǻ�
��װ���˺����ǿ�ʼ����һ�������
7,����Hello World����
����һ��Android ��Ŀ
��װJDK1.5����,Eclipse3.3���ϰ汾.��MyEclipseҲ���ԣ������߰�װ��JDK1.6��MyEclipse 8.6��

JDK1.6
MyEclipse 8.6
2������Android SDK
�� �����ҵ��ǣ�Android.com ������ǿ���GFW ��ǽ�ˣ����������ֲ��ò�ȥ�������أ���Ȼ�����ܴ����������õ�SDKҲ�ܲ���Ŷ���������Dz��ò�***����Ȼ***�ķ����ܶ࣬������Ҳ����˵�ˣ���� ��ʵ��û���ҵ����������Լ�QQ 276294057 ���ҽ�����
��ַ��http://developer.android.com/sdk/index.html
���سɹ���

Android SDK�ļ�

��ѹ�ļ�
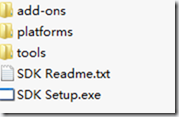
��ѹĿ¼
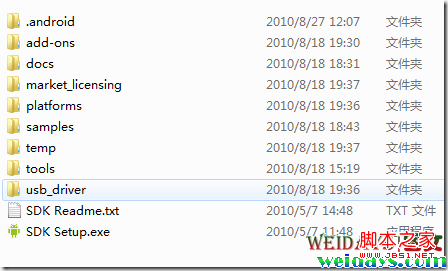
��װSDK
3������SDK����������
��Ҫ����path �м���SDK �µ�toolsĿ¼��
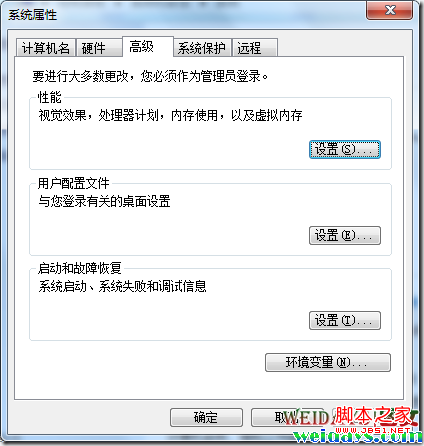
��path �м���SDK �µ�toolsĿ¼
��������
����Ժ�SDK����������ɡ�4����MyEclipse��װADT���
��eclipse��help�˵�->MyEclipse Configuration Center
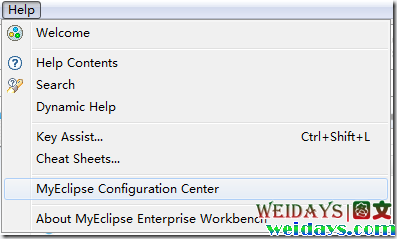
��eclipse��help�˵�
������� Software ��ǩ
Software ��ǩ

Browser Software
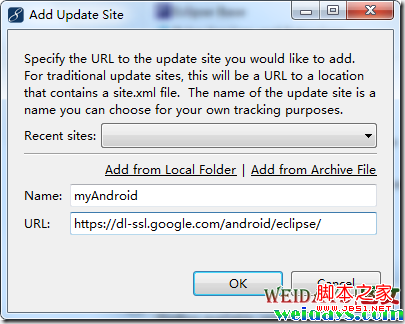
�ڶԻ�������д���ƺ���ok
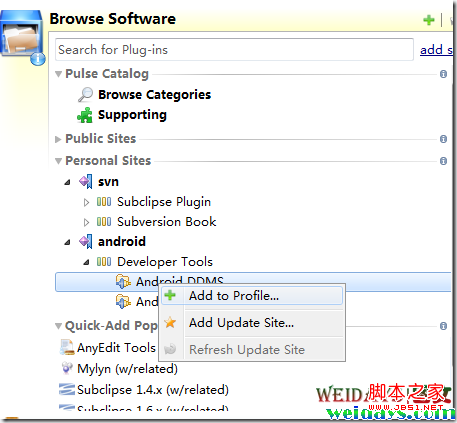
���Add to Profile
ѡ��Ŀ�꣬�Ҽ����Add to Profile���������ұߵ�Software Updates Available �ͻ�������Ӧ��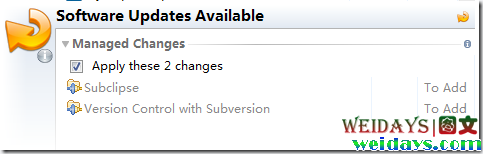
Software Updates Available

��������Apply 2 changes
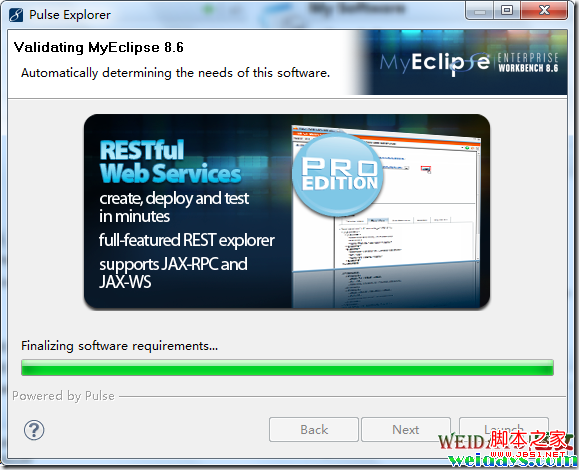
��ʼ��װ

�������
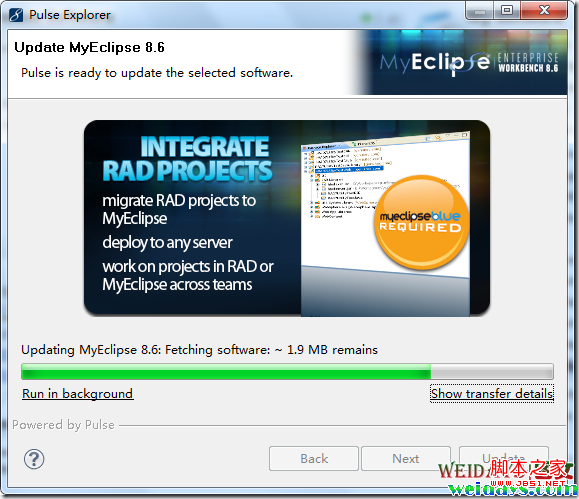
Update��ʼ��װ
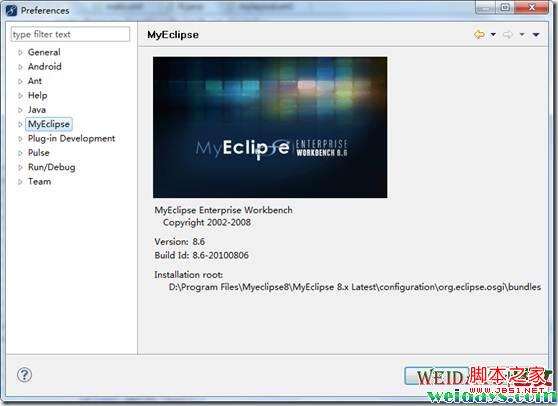
���window �C>preferences
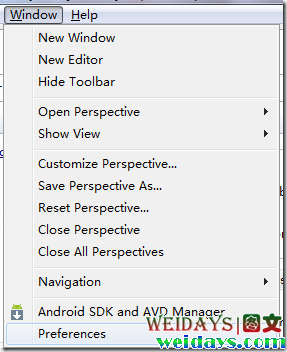
���window �C>preferences
��Androidѡ���д��SDK location�����Apply������������ݡ�
���Apply����ֵ�����
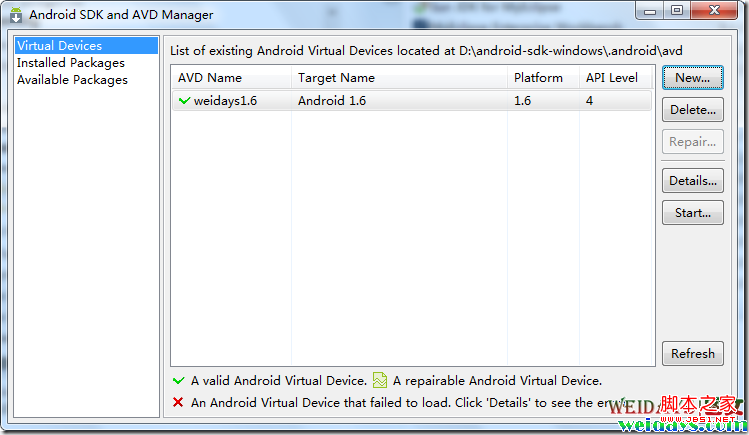
6��AVD����
���window-> Android SDK and AVD Manager

Android SDK and AVD Manager
��Ϊ��Ҫ�����Բ��ԣ����������������� ��װЩ�汾��
Ȼ���Install Selected ��ʼ��װ��������һ�������Ĺ��̣����ܷdz��������Ǻ�
��װ���˺����ǿ�ʼ����һ�������
 ���new
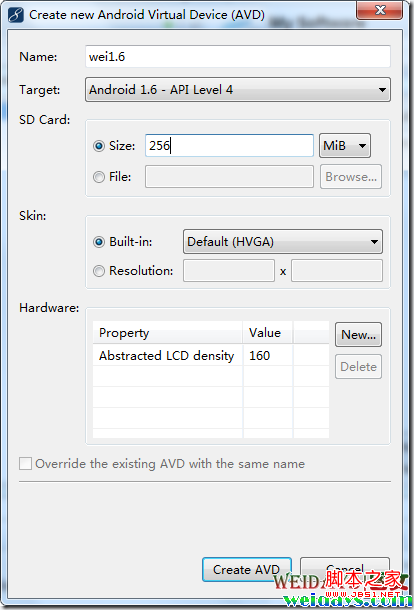
����

���������Start
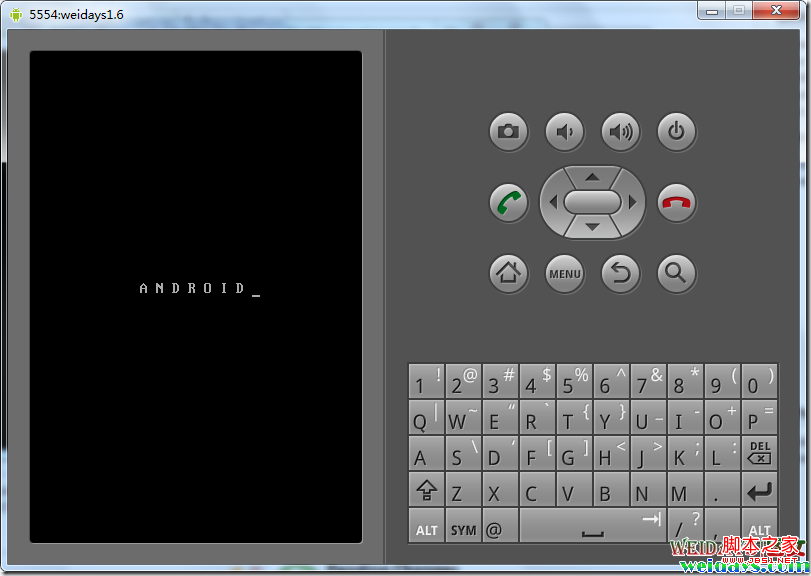
��ʼ����ģ����
7,����Hello World����
����һ��Android ��Ŀ
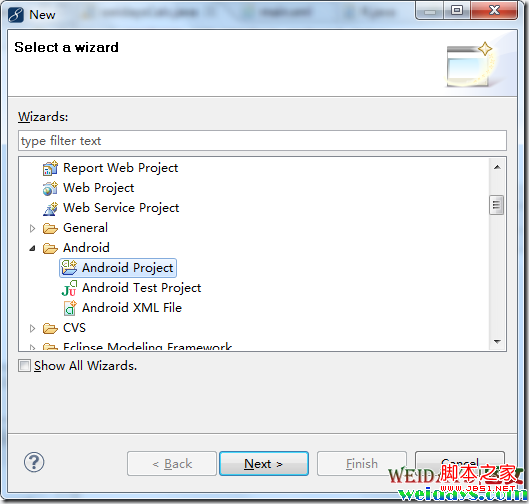
���next

���finish

����Ҽ�
���ɿ���Ч����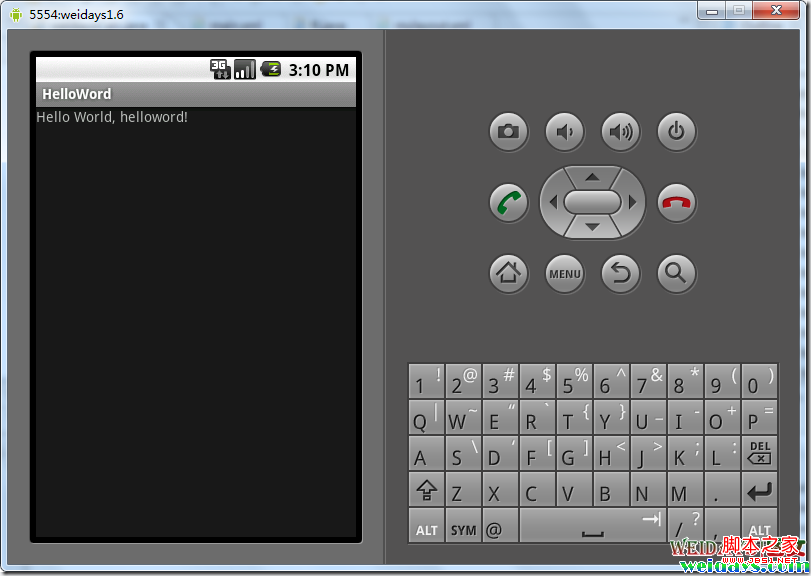
��ɹ�
- ��һƪ���£� android ����Բ��ͼƬʵ�ִ���
- ��һƪ���£� Android���ضԻ���ͬʱ�첽ִ��ʵ�ַ���
- ����Manifest.xml�в�Ҫ�����ظ���uses per
- Android��XListView֧������ˢ�º��ϻ�����
- Android����ˢ�¹ٷ���
- ����Android SQLite���������
- Android����֮�㲥����dz��
- ����Android SDCard�洢������
- Android�ͻ�����������_10������ģ�������