- IOS开发之页面间传值的几种小方法
- iOS开发-循环滚动的ScrollView
- FIR.imWeekly-技术是练出来的
- ---纯Swift的中SQLite的使用
- iOS开发日记16-动画Animation
- OC中类的扩展介绍
- 使用pushmebaby测试app的远程推送功能
- xmpp整理笔记:xmppFramework框架的导入和介绍
- 腾讯bugly的crash上报和umeng的比较
- iOS图片放大的方式(transform和frame)
- ReactiveCocoaTutorial[2]=百变RACStream;
- 【学习笔记】【C语言】数组
- IOS学习笔记----15/09/06
- 重温-单例模式
- CoreAnimation动画的使用:关键帧动画、基础动画、动画组
- IOS下拉菜单复用
- ios单个ViewController屏幕旋转
- #文档名:用Objective-C编程
- iOS中navigationController 去掉背景图片、去掉底部线条的核心代码
- IOS代码笔记之网络嗅探功能
- ios实现文件对比的方法
- 0基础学习ios开发笔记第二天
- iOS/Objective-C开发字典NSDictionary的深复制(使用category)
- Xcode升级后,cocoaPod问题
- 举例讲解iOS开发中拖动视图的实现
- 在Swift中应用GrandCentralDispatch(上)
- XMPP-IOS即时通讯XMPP相关框架导入
- iOS-知识构架管理、项目管理、思维管理(头脑风暴)Mindjet-MindManager
- 【iOS】app的生命周期
- iOS打包及发布
利用layer的mask属性实现逐渐揭示的动画效果
作者:佚名 IOS开发编辑:admin 更新时间:2022-07-23
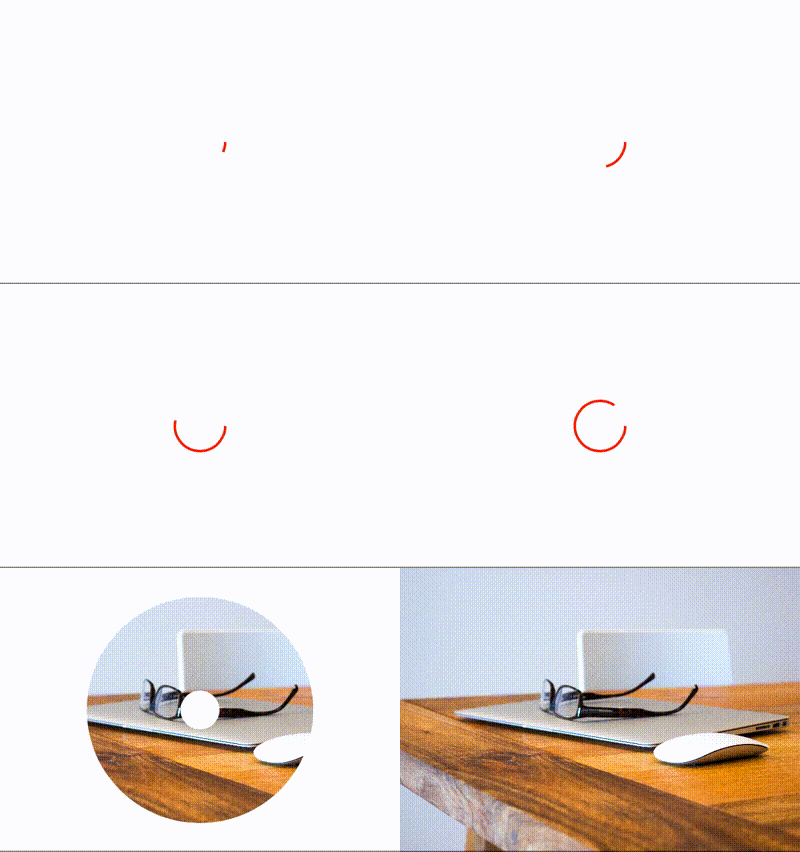
github上又看到个不错的动画(https://github.com/rounak/RJImageLoader),如图:
 所以就想来自己实现以下
不试不知道,这个动画还真不是看上去那么简单,我自己想了半天愣是没做出来,最后还是看了作者的代码,才知道怎么实现。
不过也从作者哪儿学了一招,就是layer.mask的用法。
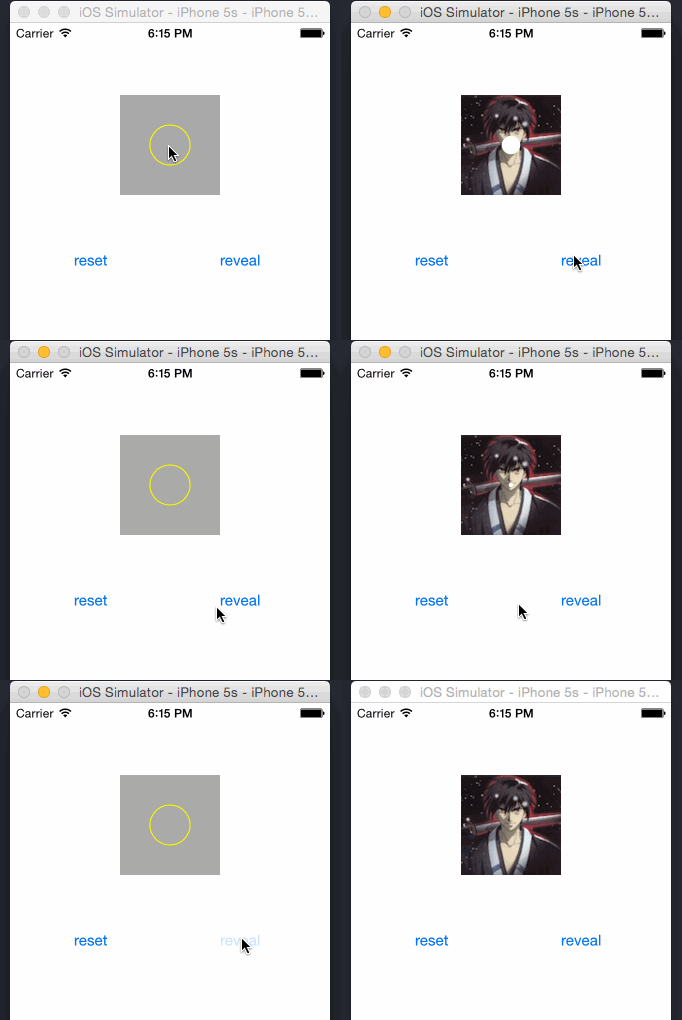
自己实现的效果如图:
 demo在这里:https://github.com/Phelthas/LXMRevealDemo
(前面的画圆的动画,这是一个CAShaperLayer修改其strokeEnd的动画,比较简单,就没有再写了)
这个动画说难也不难,其关键就在于对layer.mask的特性的运用,如果你不知道layer.mask的特性,那实现起来就相当困难了;相反,如果知道,那思路就豁然开朗了。
关键就是这个:
/* A layer whose alpha channel is used as a mask to select between the
* layer's background and the result of compositing the layer's
* contents with its filtered background. Defaults to nil. When used as
* a mask the layer's `compositingFilter' and `backgroundFilters'
* PRoperties are ignored. When setting the mask to a new layer, the
* new layer must have a nil superlayer, otherwise the behavior is
* undefined. Nested masks (mask layers with their own masks) are * unsupported. */ @property(strong) CALayer *mask; mask属性,可以实现很多形状的遮罩,其基本效果是: 比如layerA是layerB的mask,即layerB.mask = layerA; 那么layerA上透明的部分,会被绘制成白色挡住layerB(貌似都是白色,不知道能不能弄成其他颜色); layerA上不透明的部分,会被绘制成透明,显示出layerB的内容。 2015-09-07更新 之前理解错误,mask不是遮罩,不是add到layer上的另一个layer,而是控制layer本身渲染的一个layer。 效果是:比如imageLayer有一个maskLayer作为mask(注意maskLayer可以不跟imageLayer大小一样), 那maskLayer透明的地方,imageLayer就不会渲染,而是变透明,显示出imageLayer之后的内容, maskLayer不透明的地方,imageLayer就会正常渲染,显示出imageLayer本来的内容 如果maskLayer比imageLayer要小,那默认的maskLayer之外的地方都是透明的,都不会渲染。 注意:作为mask的layer不能有superLayer或者subLayer! 知道了这个,动画的思路就有了: imageView上有个遮罩,遮罩透明的部分逐渐变大,向外向内同时扩展,使遮罩后面的图片爆料出来。 这里首先需要一个圆形的CAShapeLayer,还需要两个动画,使这个layer同时向内向外扩展。 那么问题来了,只有一个layer,还不能有subLayer,怎么让它同时又变大又变小呢? 答案是:换个方式。 注意CAShapeLayer是线画出来,线也有颜色,还有宽度是 lineWidth,而且这些属性也是可以动画的。 所以最终的方案是:设置圆的线的颜色为透明,圆的填充色为不透明,园外的颜色不透明(这里的设置指的是看到的效果),让圆逐渐变大到可以显示出整个view,同时让圆的lineWidth逐渐变宽到圆的半径那么大。 看到的效果就是图片像上面的效果一样逐渐显露出来了。 核心动画代码如下: - (void)reveal {
self.backgroundColor = [UIColor clearColor];
[self.circleLayer removeFromSuperlayer];//理论上作为mask的layer不能有父layer,所以要remove掉
self.superview.layer.mask = self.circleLayer;
//让圆的变大的动画
CABasicAnimation *pathAnimation = [CABasicAnimation animationWithKeyPath:@"path"];
UIBezierPath *toPath = [self pathWithDiameter:self.bigDiameter];
// UIBezierPath *toPath = [self pathWithDiameter:0];//缩小当前path的动画
pathAnimation.toValue = (id)toPath.CGPath;
pathAnimation.duration = 1.0;
//让圆的线的宽度变大的动画,效果是内圆变小
CABasicAnimation *lineWidthAnimation = [CABasicAnimation animationWithKeyPath:NSStringFromSelector(@selector(lineWidth))];
lineWidthAnimation.toValue = @(self.bigDiameter);
lineWidthAnimation.duration = 1.0;
CAAnimationGroup *group = [CAAnimationGroup animation];
group.animations = @[pathAnimation, lineWidthAnimation];
group.duration = 1.0;
group.removedOnCompletion = NO;//这两句的效果是让动画结束后不会回到原处,必须加
group.fillMode = kCAFillModeForwards;//这两句的效果是让动画结束后不会回到原处,必须加
group.delegate = self;
[self.circleLayer addAnimation:group forKey:@"revealAnimation"]; } /**
* 根据直径生成圆的path,注意圆点是self的中心点,所以(x,y)不是(0,0)
*/
- (UIBezierPath *)pathWithDiameter:(CGFloat)diameter {
return [UIBezierPath bezierPathWithOvalInRect:CGRectMake((CGRectGetWidth(self.bounds) - diameter) / 2, (CGRectGetHeight(self.bounds) - diameter) / 2, diameter, diameter)];
}
#pragma mark - CAAnimationDelegate
- (void)animationDidStop:(CAAnimation *)anim finished:(BOOL)flag {
self.superview.layer.mask = nil;
[self removeFromSuperview];
}
#pragma mark - property
- (CAShapeLayer *)circleLayer {
if (!_circleLayer) {
_circleLayer = [CAShapeLayer layer];
_circleLayer.fillColor = [UIColor clearColor].CGColor;//这个必须透明,因为这样内圆才是不透明的
_circleLayer.strokeColor = [UIColor yellowColor].CGColor;//注意这个必须不能透明,因为实际上是这个显示出后面的图片了
_circleLayer.path = [self pathWithDiameter:self.smallDiameter].CGPath;
}
return _circleLayer; } 完整代码见github:https://github.com/Phelthas/LXMRevealDemo 有什么错误欢迎批评指正
 所以就想来自己实现以下
不试不知道,这个动画还真不是看上去那么简单,我自己想了半天愣是没做出来,最后还是看了作者的代码,才知道怎么实现。
不过也从作者哪儿学了一招,就是layer.mask的用法。
自己实现的效果如图:
 demo在这里:https://github.com/Phelthas/LXMRevealDemo
(前面的画圆的动画,这是一个CAShaperLayer修改其strokeEnd的动画,比较简单,就没有再写了)
这个动画说难也不难,其关键就在于对layer.mask的特性的运用,如果你不知道layer.mask的特性,那实现起来就相当困难了;相反,如果知道,那思路就豁然开朗了。
关键就是这个:
/* A layer whose alpha channel is used as a mask to select between the
* layer's background and the result of compositing the layer's
demo在这里:https://github.com/Phelthas/LXMRevealDemo
(前面的画圆的动画,这是一个CAShaperLayer修改其strokeEnd的动画,比较简单,就没有再写了)
这个动画说难也不难,其关键就在于对layer.mask的特性的运用,如果你不知道layer.mask的特性,那实现起来就相当困难了;相反,如果知道,那思路就豁然开朗了。
关键就是这个:
/* A layer whose alpha channel is used as a mask to select between the
* layer's background and the result of compositing the layer's* contents with its filtered background. Defaults to nil. When used as
* a mask the layer's `compositingFilter' and `backgroundFilters'
* PRoperties are ignored. When setting the mask to a new layer, the
* new layer must have a nil superlayer, otherwise the behavior is
* undefined. Nested masks (mask layers with their own masks) are * unsupported. */ @property(strong) CALayer *mask; mask属性,可以实现很多形状的遮罩,其基本效果是: 比如layerA是layerB的mask,即layerB.mask = layerA; 那么layerA上透明的部分,会被绘制成白色挡住layerB(貌似都是白色,不知道能不能弄成其他颜色); layerA上不透明的部分,会被绘制成透明,显示出layerB的内容。 2015-09-07更新 之前理解错误,mask不是遮罩,不是add到layer上的另一个layer,而是控制layer本身渲染的一个layer。 效果是:比如imageLayer有一个maskLayer作为mask(注意maskLayer可以不跟imageLayer大小一样), 那maskLayer透明的地方,imageLayer就不会渲染,而是变透明,显示出imageLayer之后的内容, maskLayer不透明的地方,imageLayer就会正常渲染,显示出imageLayer本来的内容 如果maskLayer比imageLayer要小,那默认的maskLayer之外的地方都是透明的,都不会渲染。 注意:作为mask的layer不能有superLayer或者subLayer! 知道了这个,动画的思路就有了: imageView上有个遮罩,遮罩透明的部分逐渐变大,向外向内同时扩展,使遮罩后面的图片爆料出来。 这里首先需要一个圆形的CAShapeLayer,还需要两个动画,使这个layer同时向内向外扩展。 那么问题来了,只有一个layer,还不能有subLayer,怎么让它同时又变大又变小呢? 答案是:换个方式。 注意CAShapeLayer是线画出来,线也有颜色,还有宽度是 lineWidth,而且这些属性也是可以动画的。 所以最终的方案是:设置圆的线的颜色为透明,圆的填充色为不透明,园外的颜色不透明(这里的设置指的是看到的效果),让圆逐渐变大到可以显示出整个view,同时让圆的lineWidth逐渐变宽到圆的半径那么大。 看到的效果就是图片像上面的效果一样逐渐显露出来了。 核心动画代码如下: - (void)reveal {
self.backgroundColor = [UIColor clearColor];
[self.circleLayer removeFromSuperlayer];//理论上作为mask的layer不能有父layer,所以要remove掉
self.superview.layer.mask = self.circleLayer;
//让圆的变大的动画
CABasicAnimation *pathAnimation = [CABasicAnimation animationWithKeyPath:@"path"];
UIBezierPath *toPath = [self pathWithDiameter:self.bigDiameter];
// UIBezierPath *toPath = [self pathWithDiameter:0];//缩小当前path的动画
pathAnimation.toValue = (id)toPath.CGPath;
pathAnimation.duration = 1.0;
//让圆的线的宽度变大的动画,效果是内圆变小
CABasicAnimation *lineWidthAnimation = [CABasicAnimation animationWithKeyPath:NSStringFromSelector(@selector(lineWidth))];
lineWidthAnimation.toValue = @(self.bigDiameter);
lineWidthAnimation.duration = 1.0;
CAAnimationGroup *group = [CAAnimationGroup animation];
group.animations = @[pathAnimation, lineWidthAnimation];
group.duration = 1.0;
group.removedOnCompletion = NO;//这两句的效果是让动画结束后不会回到原处,必须加
group.fillMode = kCAFillModeForwards;//这两句的效果是让动画结束后不会回到原处,必须加
group.delegate = self;
[self.circleLayer addAnimation:group forKey:@"revealAnimation"]; } /**
* 根据直径生成圆的path,注意圆点是self的中心点,所以(x,y)不是(0,0)
*/
- (UIBezierPath *)pathWithDiameter:(CGFloat)diameter {
return [UIBezierPath bezierPathWithOvalInRect:CGRectMake((CGRectGetWidth(self.bounds) - diameter) / 2, (CGRectGetHeight(self.bounds) - diameter) / 2, diameter, diameter)];
}
#pragma mark - CAAnimationDelegate
- (void)animationDidStop:(CAAnimation *)anim finished:(BOOL)flag {
self.superview.layer.mask = nil;
[self removeFromSuperview];
}
#pragma mark - property
- (CAShapeLayer *)circleLayer {
if (!_circleLayer) {
_circleLayer = [CAShapeLayer layer];
_circleLayer.fillColor = [UIColor clearColor].CGColor;//这个必须透明,因为这样内圆才是不透明的
_circleLayer.strokeColor = [UIColor yellowColor].CGColor;//注意这个必须不能透明,因为实际上是这个显示出后面的图片了
_circleLayer.path = [self pathWithDiameter:self.smallDiameter].CGPath;
}
return _circleLayer; } 完整代码见github:https://github.com/Phelthas/LXMRevealDemo 有什么错误欢迎批评指正
- 上一篇文章: cocoaPods的配置
- 下一篇文章: 【学习笔记】【OC语言】类方法