
- FC 5 php 不可以连接远程mysql数据库
- PHPShop存在多个安全漏洞
- 通过ICQ网关发送手机短信的PHP源程序
- 什么是脚本语言?
- PHP+TEXT留言本(六)
- [视频教程]PHP100视频教程56:制作PHP安装程序的原理和步骤
- zendstudio常用快捷键
- PHP 使用memcached
- PHP的学习--使用PhpDocumentor 2生成API文档
- 荒芜的周六-PHP之面向对象(三)
- 使用PHP的Socket写的POP3类
- 10个实用的PHP正则表达式
- PEAR:常用模块
- 简单linux下php获取服务器状态代码
- [视频教程]LAMP兄弟连视PHP函数-getdate
- PHP下载远程文件类(支持断点续传)
- PHP网站开发遇到的中文编码
- 最令PHP初学者头痛的十四个问题
- CI整合Smarty
- Joomla 二次开发 学习笔记
- 将Session写入数据库
- 动态网页制作PHP常用的正则表达式
- [视频教程]LAMP兄弟连视PHP函数-htmlspecialchars
- 微信支付之扫码支付开发:我遇到的坑及解决办法(附:Ecshop 微信支付插件)
- 基于PHP的cURL快速入门
- PHP下实现端口复用/劫持
- PHP安装全攻略:APACHE
- 超级简单的发送邮件程序
- 我期望的禅道界面布局
- 消息持续发送的完整例子
【03】WAMPServer集成环境下载和安装
作者:佚名 php网站开发编辑:admin 更新时间:2022-07-23
WAMPServer集成环境下载和安装
1、W:windows,A:Apache,M:MySQL,P:php
2、下载WAMP开发包网址:www.wampserver.com
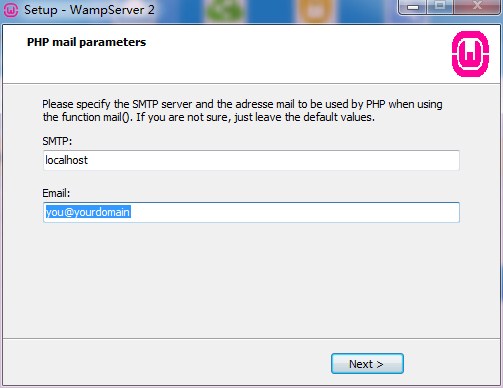
 3、安装WampServer:双击安装包→运行→Next→我接受→Next→目录→Next→Next→安装→否→Next→Finish
4、测试是否安装成功:打开浏览器→输入localhost→回车→出现WampServer的信息则成功
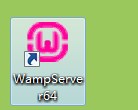
软件图标:
 输入localhost回车后:
 安装成功;
安装成功;
 在任务栏右边,可以点击软件图标。
右键图标,可以修改语言。可以修改为中文。
在任务栏右边,可以点击软件图标。
右键图标,可以修改语言。可以修改为中文。
 Localhost 本地主机
phpMyAdmin 数据库可视化管理工具。
www目录。网站根目录。
Apache
webGrind 网站性能。
【】修改网站目录为自己的项目目录,而不是www目录。
修改Apache
Localhost 本地主机
phpMyAdmin 数据库可视化管理工具。
www目录。网站根目录。
Apache
webGrind 网站性能。
【】修改网站目录为自己的项目目录,而不是www目录。
修改Apache
 ctrl+f搜索
输入documentroot
ctrl+f搜索
输入documentroot
 比如我们的项目在F盘的demo文件夹中,那么可以这么改
修改这里的文件:
比如我们的项目在F盘的demo文件夹中,那么可以这么改
修改这里的文件:
 修改这里
修改这里
 为:
为:

保存,关闭。 重启web服务。 对配置文件的修改,都需要重启服务器。
测试是否成功修改:
在F:/demo 新建test.php 内容为: 在浏览器中输入localhost/test.php
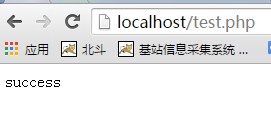 成功!!
看WWW目录。
web集成开发包的配置要修改。
在安装目录下:
成功!!
看WWW目录。
web集成开发包的配置要修改。
在安装目录下:
 打开。搜索:menu.left或是直接搜索:“www 目录”

Type: item;Caption:"www 目录";Action: shellexecute;FileName:"D:/wamp/www";Glyph:2
Type: item;Caption:"demo 目录";Action: shellexecute;FileName:"F:/demo";Glyph:2
 记事本打开;
搜索menu.left (可能有多次menu.let)
记事本打开;
搜索menu.left (可能有多次menu.let)
 修改:
修改:
Type: item;Caption:"${w_wwwDirectory}";Action: shellexecute;FileName:"${wwwDir}";Glyph:2
Type: item;Caption:"demo 目录";Action: shellexecute;FileName:"F:/demo";Glyph:2
 修改成功。
修改成功。
- 上一篇文章: PHP进行统一邮箱登陆的代理实现(swoole)
- 下一篇文章: Mac配置PHP